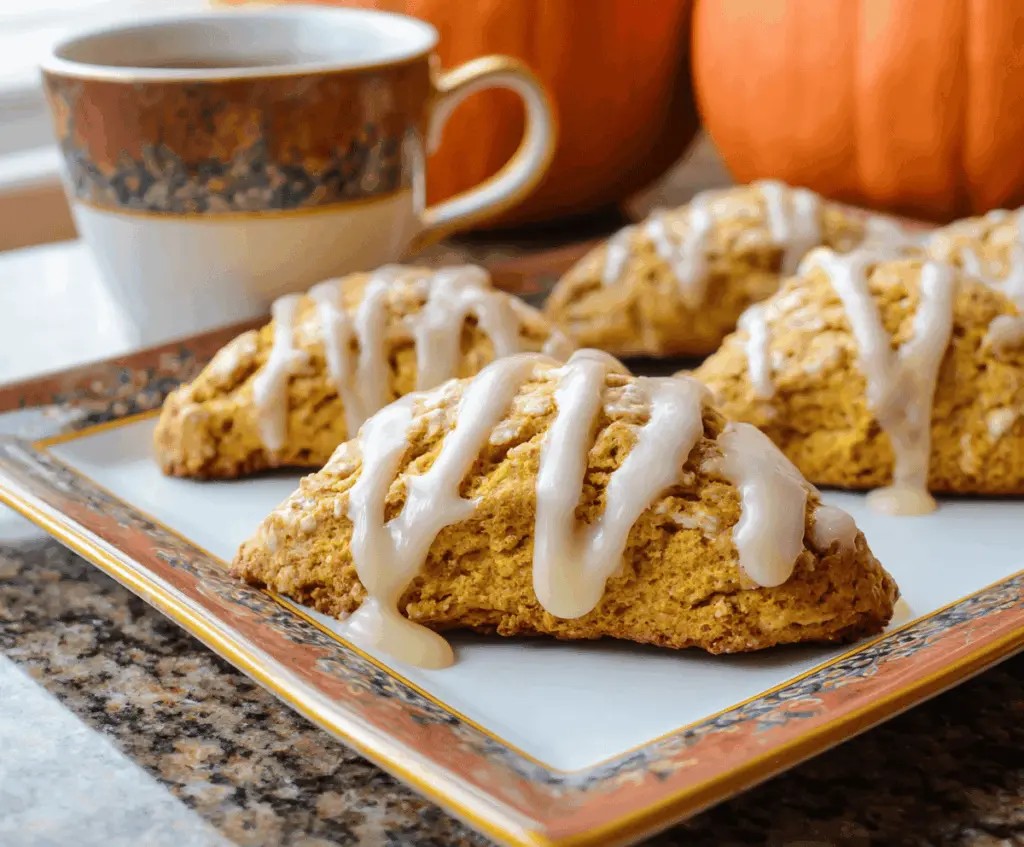
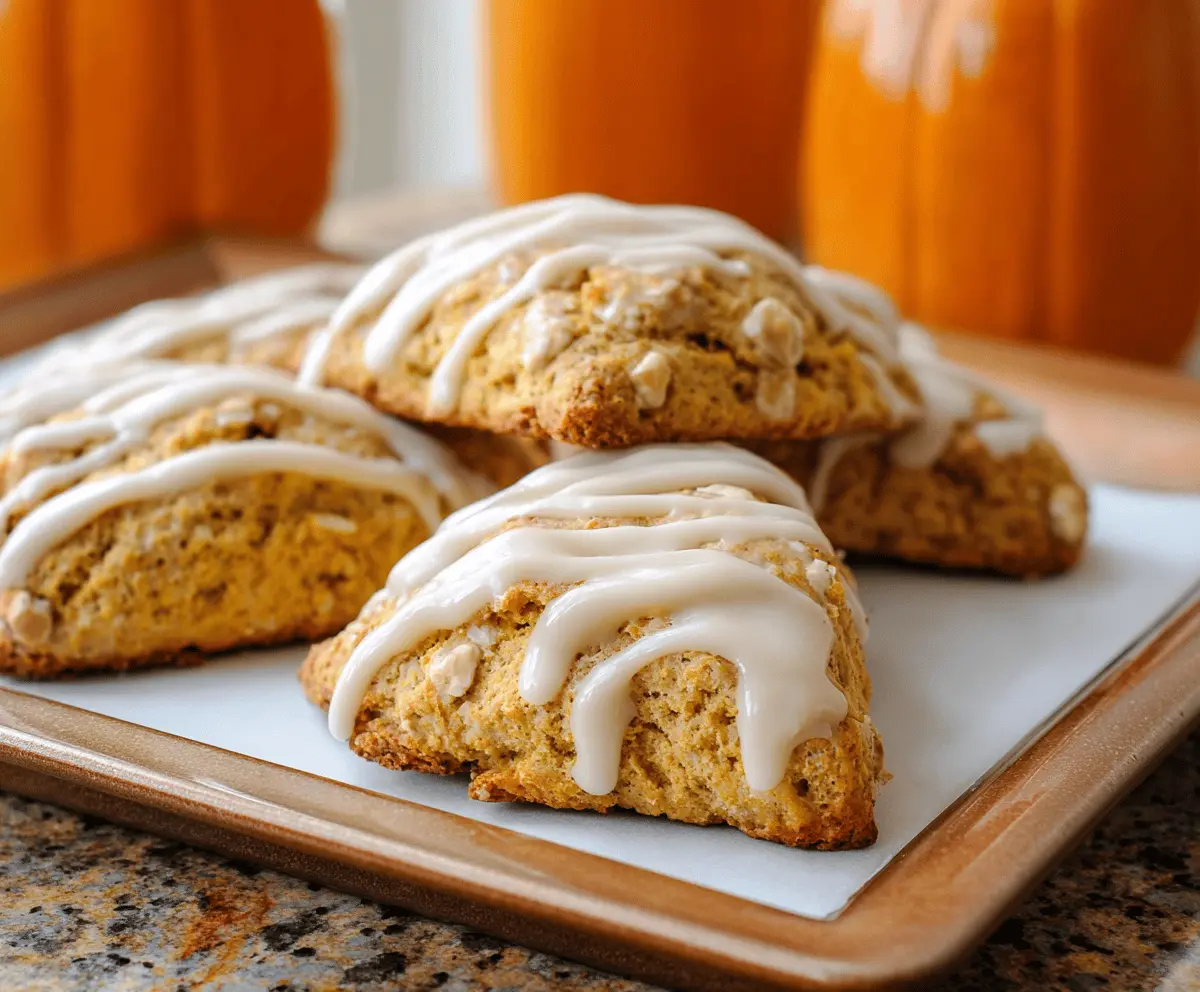
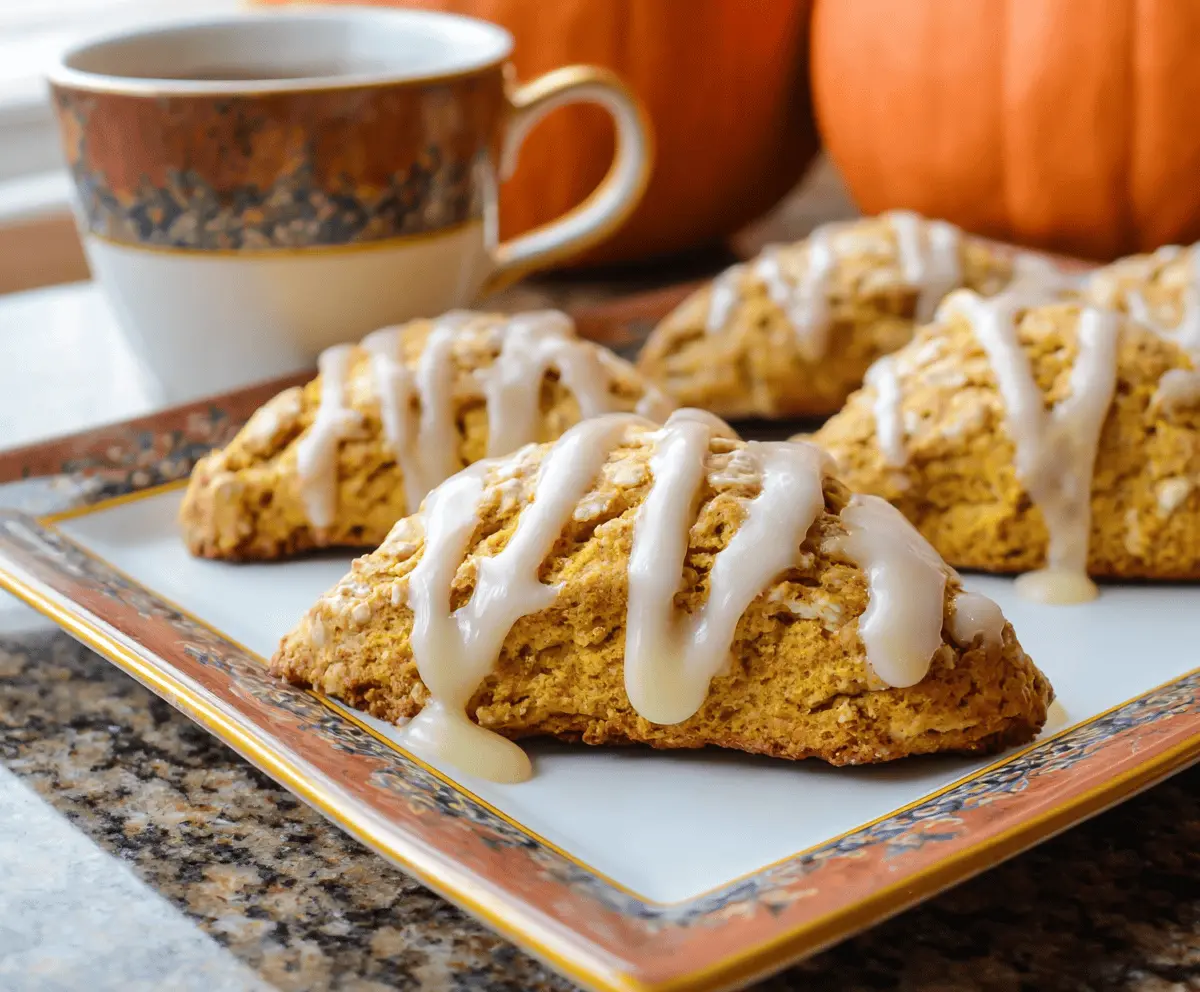
These pumpkin scones are soft and moist, bursting with the cozy flavors of fall. Topped with a sweet maple icing, they are perfect for breakfast or a delightful snack!
I love how easy these scones are to whip up. Plus, enjoy them warm with a cup of tea! They make your kitchen smell amazing, and who can resist that? 🍂❤️
Key Ingredients & Substitutions
All-Purpose Flour: This is the foundation for your scones. If you need a gluten-free option, try a 1:1 gluten-free flour blend. I’ve done this and the results are just as satisfying!
Rolled Oats: They add texture and a slight chew to the scones. If you’re out, quick oats will also work. Just don’t use instant oats, as they can make the texture too mushy.
Granulated Sugar: This sweetens the scones. For a less refined option, coconut sugar or brown sugar can be used. They’ll add a hint of caramel flavor!
Canned Pumpkin Purée: This brings the pumpkin flavor and moisture. If you prefer, you can use cooked and pureed fresh pumpkin, but be sure to properly drain any excess water.
Maple Syrup: Essential for the icing! If you’re looking for a vegan version, use agave syrup instead. It won’t have the same maple flavor, but it’ll sweeten nicely.
How Do I Cut in Butter for Scones?
Cutting in butter is a crucial step for achieving light and flaky scones. This is how you do it:
- Use very cold butter to keep the scones tender. Cubing it helps it blend evenly.
- With a pastry cutter or two forks, mix the butter into the dry ingredients, breaking it up until it resembles coarse crumbs. Aim for some pea-sized pieces. This helps create flaky layers!
Be patient during this step—it’s the secret to fluffy scones!
What’s the Best Way to Shape Scones?
Shaping scones can be fun! After gently kneading the dough, shape it into a circle. Here’s how:
- Flour your hands and the surface lightly to prevent sticking.
- Pat or roll the dough into a circle about 1 inch thick. Try to keep it even.
- Use a sharp knife to cut it into 8 equal triangles, pressing down without sawing. You can also use a biscuit cutter for round scones!
Don’t worry about making them perfect—scones are supposed to have a rustic look!
Pumpkin Scones with Maple Icing
Ingredients You’ll Need:
For the Pumpkin Scones:
- 2 cups all-purpose flour
- 1 cup rolled oats
- 1/2 cup granulated sugar
- 1 tablespoon baking powder
- 1/2 teaspoon salt
- 1 teaspoon ground cinnamon
- 1/2 teaspoon ground nutmeg
- 1/4 teaspoon ground ginger
- 1/2 cup (1 stick) cold unsalted butter, cubed
- 1 cup canned pumpkin puree
- 1 large egg
- 1 teaspoon vanilla extract
For the Maple Icing:
- 1 cup powdered sugar
- 2 tablespoons pure maple syrup
- 1-2 tablespoons milk (or cream), as needed to thin icing
How Much Time Will You Need?
This recipe takes about 15 minutes for preparation and around 18-22 minutes for baking. In total, you should expect to spend around 40 minutes to make these delightful pumpkin scones!
Step-by-Step Instructions:
1. Preheat Oven:
Start by preheating your oven to 400°F (200°C). Line a baking sheet with parchment paper or a silicone baking mat to prevent sticking.
2. Mix Dry Ingredients:
In a large mixing bowl, whisk together the flour, rolled oats, sugar, baking powder, salt, cinnamon, nutmeg, and ginger until well blended.
3. Cut in Butter:
Using a pastry cutter, two forks, or your fingertips, cut the cold, cubed butter into the dry mixture. Continue until it resembles coarse crumbs with pea-sized pieces, which will create a flaky texture in the scones.
4. Combine Wet Ingredients:
In a separate bowl, whisk together the pumpkin puree, egg, and vanilla extract. Blend until smooth.
5. Form Dough:
Pour the pumpkin mixture into the dry ingredients. Gently stir the mixture using a spoon or spatula until just combined. Be careful not to overmix!
6. Shape Scones:
Transfer the dough onto a lightly floured surface. Knead gently 2-3 times until it comes together. Pat or roll the dough into a circle about 1 inch thick. Use a sharp knife to cut the circle into 8 equal triangles.
7. Bake:
Place the shaped scones on your prepared baking sheet, making sure they are spaced evenly. Bake in the preheated oven for 18-22 minutes, or until they are golden brown and a toothpick inserted into the center comes out clean.
8. Make the Maple Icing:
While the scones are baking, prepare the icing by whisking together the powdered sugar and maple syrup in a small bowl. Gradually add milk one teaspoon at a time until you achieve a drizzle consistency.
9. Glaze the Scones:
Once the scones have cooled for about 5-10 minutes, generously drizzle the maple icing over the top of warm scones for a delightful finish.
10. Serve:
Enjoy your pumpkin scones warm or at room temperature, perfect alongside your favorite hot beverage. They are sure to bring warmth and joy to your day!
These pumpkin scones are the perfect balance of spice and sweetness, with a scrumptious maple icing that takes them to the next level. Enjoy your homemade treat!
Can I Use Fresh Pumpkin Instead of Canned?
Yes, you can use fresh pumpkin! Just make sure to cook and mash it first, and drain any excess moisture to avoid making the dough too wet.
How Should I Store Leftover Scones?
Store leftover scones in an airtight container at room temperature for up to 2 days. For longer freshness, refrigerate them for up to a week or freeze for up to 3 months. Reheat promptly when you’re ready to enjoy!
Is There a Gluten-Free Option for This Recipe?
Definitely! You can substitute all-purpose flour with a gluten-free 1:1 flour blend. Ensure the rolled oats are marked gluten-free as well, to keep the recipe entirely gluten-free.
What If the Dough Is Too Sticky?
If your dough is too sticky, gradually add a tablespoon of flour at a time until it becomes easier to work with. Be careful not to overmix, which can lead to tougher scones.