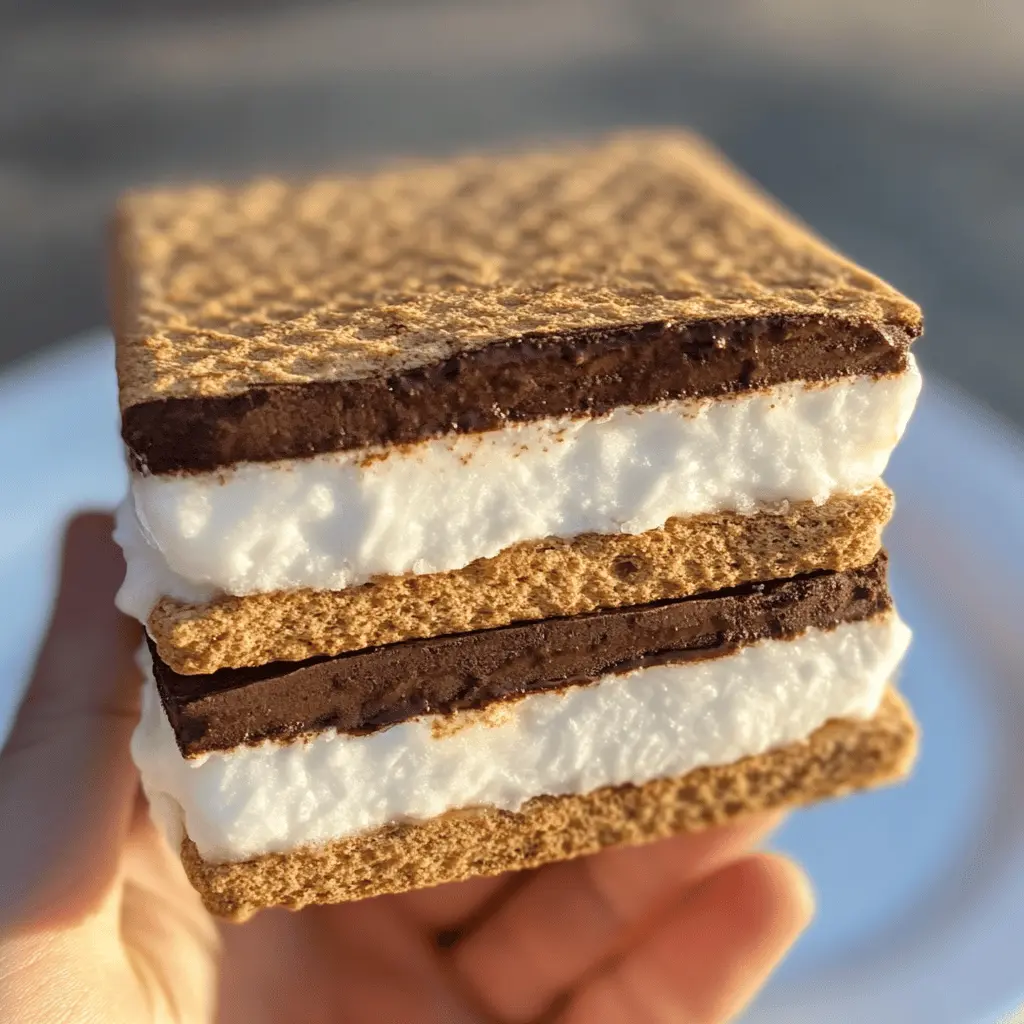
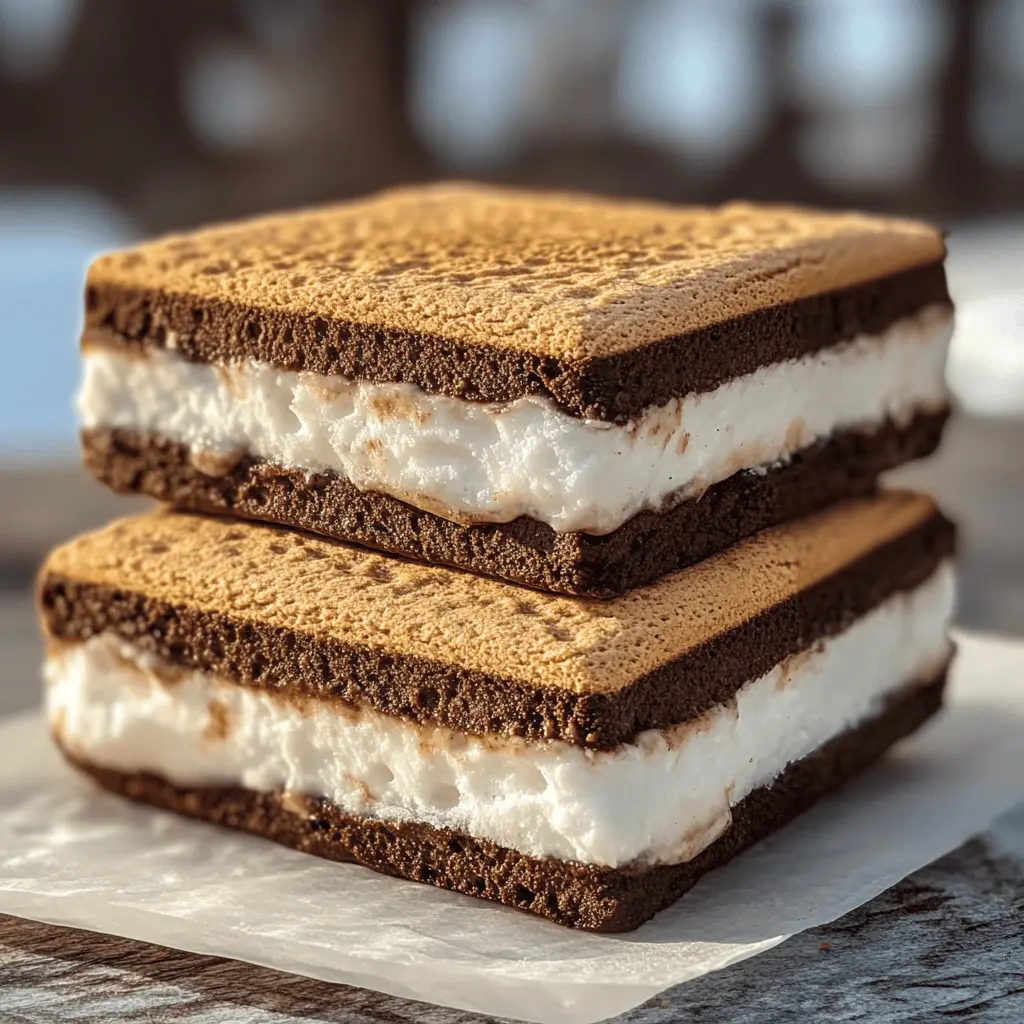
Frozen s’mores are a fun treat that brings the campfire right to your freezer! With layers of chocolate, marshmallow, and graham crackers, they are cool, creamy, and oh-so-delicious.
Making them is as easy as pie—you just layer, freeze, and enjoy! I love grabbing one on a hot day when I need a sweet pick-me-up. They are a total crowd-pleaser! 🍫🔥
Key Ingredients & Substitutions
Chocolate Ice Cream: This is the star of your Frozen S’mores! You can use any flavor that you love, like vanilla or even a peanut butter swirl for a twist. Try dairy-free options if you’re lactose intolerant.
Marshmallow Fluff: This brings that classic s’mores texture. If you can’t find fluff, try using homemade whipped meringue or even a marshmallow cream. Both work well and give a similar taste.
Graham Crackers: Regular graham crackers are traditional, but you could use chocolate-flavored ones for added richness or gluten-free ones if needed. Just make sure they’re sturdy enough for layering!
Whipped Cream: This is optional, but it adds a nice touch of creaminess. You can use store-bought whipped topping or make your own using heavy cream. For a dairy-free option, coconut whipped cream works wonderfully too.
Chocolate Syrup: Use this for drizzling to enhance the flavor. You can substitute with caramel sauce or a fruit sauce like raspberry if you want to change things up.
How Do I Layer My Ingredients for the Best Texture?
The layering process in this recipe is crucial for achieving a nice texture. Start with a solid base of graham crackers—they provide crunch and stability. The layers should be spread evenly to maintain balance as you slice through later.
- **First Layer:** Spread softened ice cream carefully. If it’s too hard, let it sit out for a few minutes, so it spreads smoothly.
- **Marshmallow Fluff Layer:** Use a spatula for even distribution. This will melt slightly as frozen and create a delightful creaminess.
- **Final Layer & Press:** After layering everything, press down gently as it helps everything bind together. The last layer of graham crackers should sit snugly on top before freezing.
Be sure to freeze the dish long enough. If you’re in a hurry, a quick blast in the freezer (an hour or so) works, but overnight gives the best results! Remember to let it sit at room temp a few minutes before cutting for easy serving.
How to Make Delicious Frozen S’mores
Ingredients You’ll Need:
For the Filling:
- 2 cups chocolate ice cream, softened slightly
- 1 cup marshmallow fluff
For the Layers:
- 1 package graham crackers (about 14 sheets)
- 1 cup whipped cream or whipped topping (optional)
- 1/4 cup chocolate syrup (optional, for drizzling)
- Pinch of salt (for flavor enhancement)
How Much Time Will You Need?
You’ll need about 15 minutes of preparation time and then at least 4-6 hours for the s’mores to freeze completely. So, it’s a great make-ahead dessert to prepare for gatherings or just to enjoy on a warm day!
Step-by-Step Instructions:
1. Prepare Your Baking Dish:
First, grab an 8×8 inch baking dish (or something similar) and line it with parchment paper. This will make it super easy to lift out your frozen s’mores later.
2. Lay Down the First Layer:
Take your graham crackers and place a single layer on the bottom of the prepared dish. If needed, break some of the pieces so they fit perfectly. This is the crunchy base for your yummy treat!
3. Add the Chocolate Ice Cream:
Now, spread half of the softened chocolate ice cream over the graham crackers. Use a spatula to smooth it out, making sure it covers the crackers evenly.
4. Spread the Marshmallow Fluff:
Next, it’s time to slather on the marshmallow fluff! Spread it evenly over the layer of chocolate ice cream. This is where the s’mores become extra gooey and delicious!
5. Optional Creamy Layer:
If you want an even creamier texture, add a layer of whipped cream over the marshmallow fluff. This is totally optional, but who doesn’t love more whipped cream?
6. Second Layer of Graham Crackers:
Place another layer of graham crackers on top, gently pressing them down to create a nice even surface. This helps to build up that s’mores structure!
7. More Chocolate Ice Cream:
Spread the remaining chocolate ice cream on top of the second layer of graham crackers. Again, smooth it out evenly with your spatula.
8. Final Touch with Graham Crackers:
Top everything off with a final layer of graham crackers, pressing them down gently to secure everything in place.
9. Freeze Your Creation:
Cover the baking dish with plastic wrap and pop it in the freezer. Let it freeze for at least 4-6 hours or until it’s frozen solid. The longer, the better!
10. Slice and Serve:
Once your frozen s’mores are ready, take the dish out of the freezer and let it sit for a few minutes at room temperature. This will make slicing easier. Cut into squares and if you like, drizzle with some chocolate syrup for that extra touch before serving.
Enjoy your delicious and refreshing Frozen S’mores!
Can I Use a Different Flavor of Ice Cream?
Absolutely! Feel free to experiment with different flavors of ice cream like vanilla, cookies and cream, or even peanut butter. Just keep in mind that the flavor will alter the overall taste of your Frozen S’mores, so choose something you love!
How Do I Store Leftovers?
Store any leftovers in an airtight container in the freezer. It’s best consumed within two weeks for the best flavor and texture. If you’re worried about freezer burn, wrap individual squares in plastic wrap before placing them in the container.
Is There a Substitute for Marshmallow Fluff?
If you don’t have marshmallow fluff, you can substitute it with homemade marshmallow cream or melted marshmallows. To make your own, melt about 3 cups of mini marshmallows with 2 tablespoons of water over low heat, stirring until smooth, then cool slightly before spreading it on your layers.
Can I Adjust the Sweetness of This Recipe?
Yes! You can reduce the sweetness by opting for a less sweet ice cream or using unsweetened whipped cream. Additionally, you can skip the chocolate syrup drizzle or just use a tiny amount to control the sweetness level. Tasting as you go is key!